

January means it's back to school time for kids everywhere! Whether it's high school or college, having the right tools to keep a student interested in learning is important. Today I'm teaming up with Sharpies and Staples to share how to make a DIY hand lettered notebook for your kids (or in my case, my niece!). Click through for the full how-to.
Who doesn't love Sharpies? I always have a slew of these things around.
First, you want to start with all of the right tools. I went to Staples and picked up a boatload of them! During the week of January 24th, Sharpies are all 35% off while supplies last, so it's a great time to stock up on your favorites! I made sure to grab lots of colors and sizes, as well as some other supplies to complete my project.
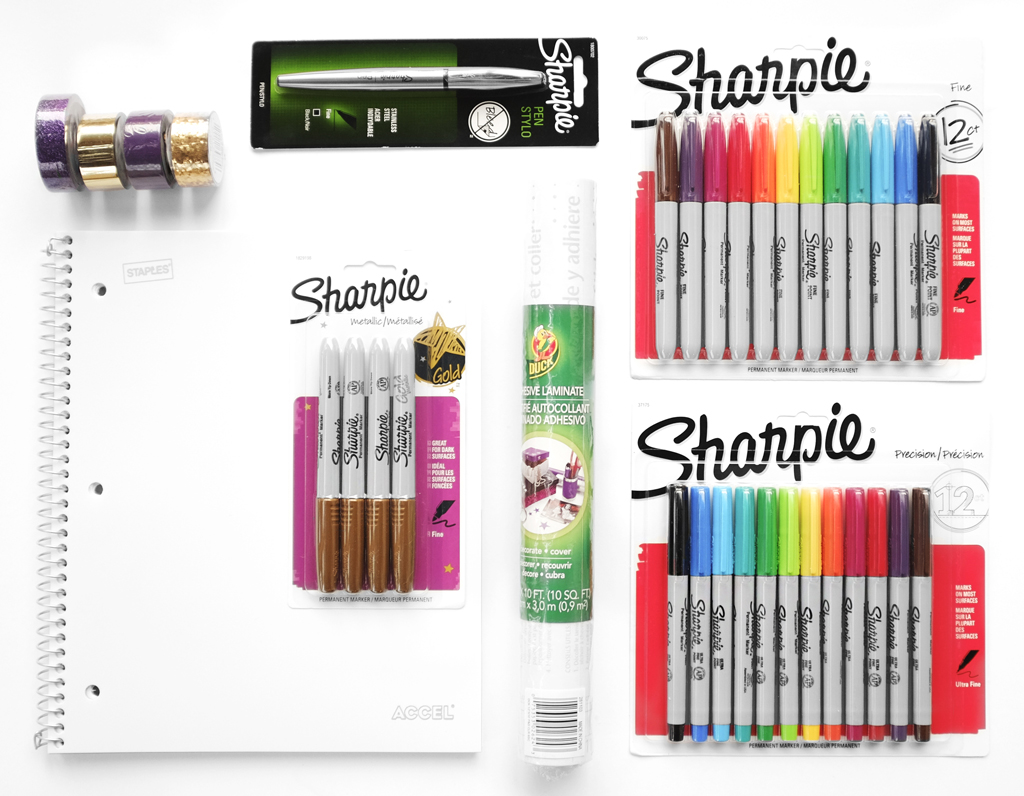
Here's what I bought:
❖ Sharpie Fine
❖ Sharpie Precision
❖ Sharpie Gold
❖ Sharpie Pen
❖ White notebook
❖ Duck clear adhesive laminate
❖ Masking and washi tape in purples and gold.
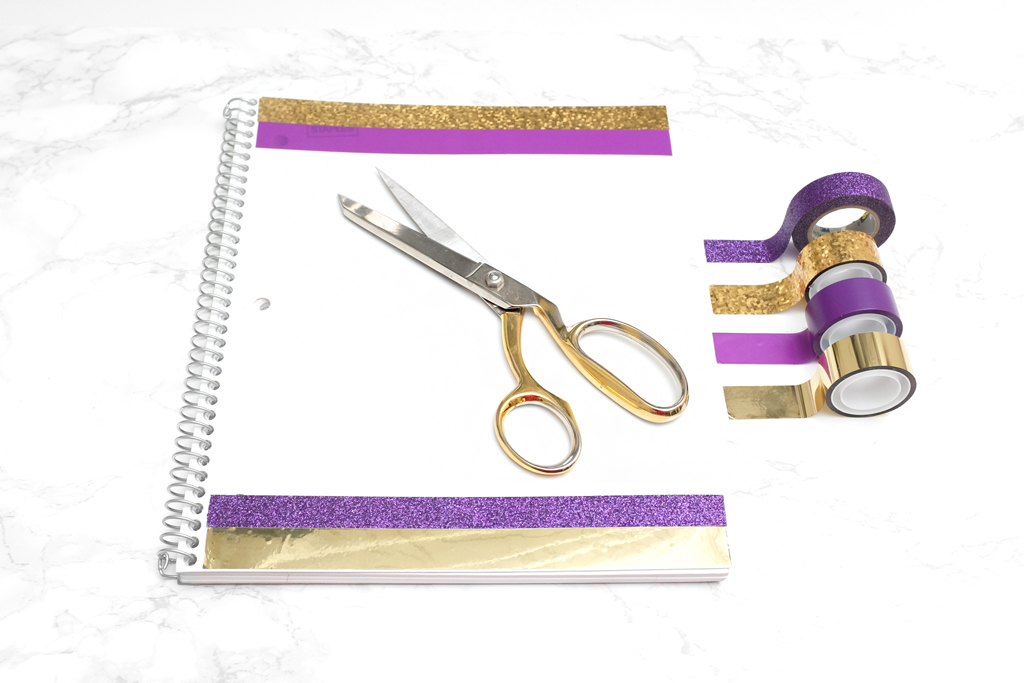
To being, I used the tape to "line" the notebook and make a border. My niece's school colors are purple and white, so I chose to make it a purple, gold and white theme. By framing the notebook with tape, I was also able to cover up any logos that were on the front cover.
This is one of those perfect notebooks with the front pocket. I used to love these when I was in high school! I think I probably went through a million of these. These folders are perfect for kids to keep their assignments, papers and notes organized in the new year!

Next, I practiced some lettering and phrases. I wanted something positive that would help keep my niece in good spirits every day when she would use it. I had the idea to play off of the gold marker and landed on the phrase You have a heart of gold. What a great compliment, right? :)

Once I had my design and phrase down, I hand lettered them on the front cover with the Sharpie Fine and Sharpie Gold. I did these free hand, but a lot of these plastic notebook covers are sheer enough that you could easily use a lightbox and "trace" your design you've already laid out. Once I had my letters complete, I added some black accents with the Sharpie Precision in black.
After the lettering was complete, I layered the front of the notebook with the Duck Laminate. This keeps from the marker from getting too beat over with use. Be careful to try and get this laminate on in one smooth motion, otherwise you could mess up your design!

I need up sending this to my niece with a motivational note, a set of Sharpie Markers and Pen, and some of these cute giant paperclips. I hope she enjoys using this notebook everyday in her high school classes!
What's your favorite use for Sharpies?
--
This post is part of a social shopper marketing insight campaign with Pollinate Media Group® and Newell Rubbermaid, but all my opinions are my own. #pmedia #stockup4schools http://my-disclosur.es/OBsstV. Thank you so much for supporting the brands who help make Mini Penny Blog possible!
No comments:
Post a Comment