

I'm so excited to finally share this tutorial for the buffalo check plaid cake I made for Sarah's birthday at Camp Wandawega. I was looking for something creative and themed to do for her special day and loved the look of these, but all of the "tutorials" I found through Pinterest were either wrong (i.e.: they didn't even make the correct plaid pattern! Ew!) or they were behind a paywall. I knew that if I just drew it out and through about it, I'd be able to figure it out on my own. I did and now I'm sharing it with you! Click through for the how-to.

What you'll need to do is to make 6 round cakes. I made two white cakes and dyed them with red food coloring. I made four chocolate cakes and dyed two of them with black food coloring and left two of them chocolate. You must make 6 cakes in order to get four stackable rings in the correct pattern!
The next step is cutting the rings in the same uniform way. See the diagram below.
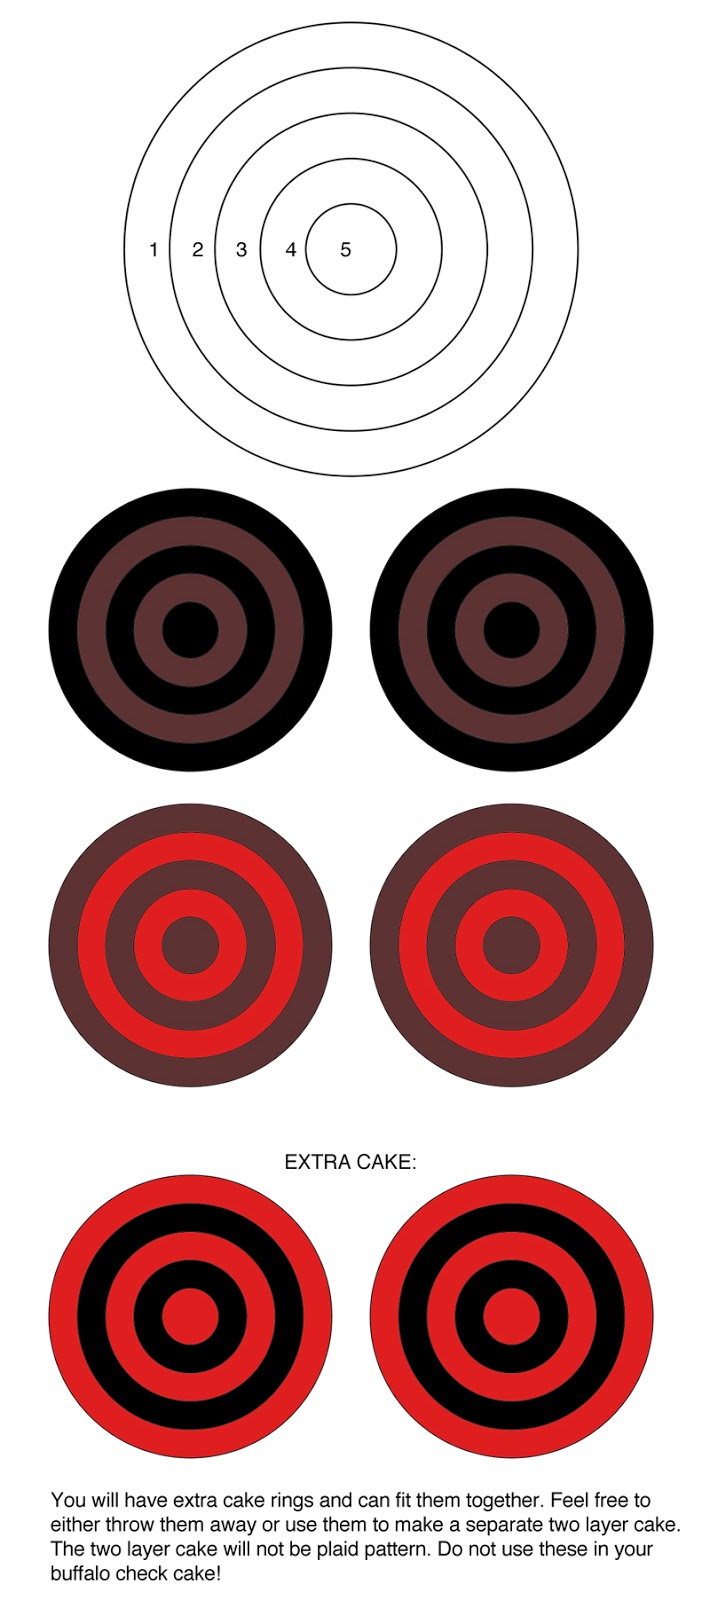
This part is so very important. I made stencils so that I could cut each cake into the same size rings. Cut all six cakes with your template and carefully (!!) fit them together to create the combinations in the chart above.
You will have extra red and extra black rings (as shown above). You can throw this away or keep it and do what I did — make yourself a little two layer cake to enjoy at home.
Here's what your buffalo check rings will look like:
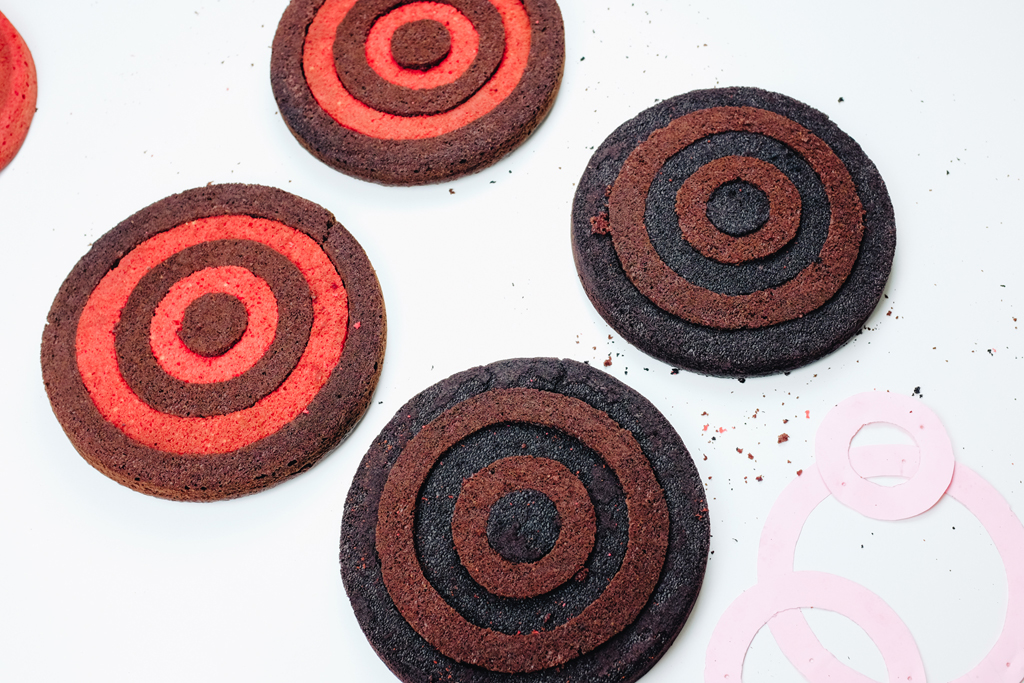
You will now have four separate layers for your cake — two that are brown-red-brown-red-brown and two that are black-brown-black-brown-black. When stacking these, we much think in terms of cross-sections. Your black rings will always need to sit directly over brown rings in oder to get the proper plaid! Stack them every-other color way as shown in the next photo. Use a frosting of your choice (I used chocolate!) in between each layer.

I chose to stack them like this:
brown-red-brown-red-brown
black-brown-black-brown-black
brown-red-brown-red-brown
black-brown-black-brown-black
Use a dowel rod in the middle of the cake so that it doesn't slide.
And now you can decorate it however you wish! Most of the cakes on Pinterest had woodgrain decorations, but I opted for a fondant and buttercream cable knit sweater design! I added some faux leaves and script lettering to make it extra special.

This was an awesome and satisfying project that offered up just enough challenge to keep me on my toes! I was so pleased to slice this cake and surprise everyone with the design on the inside.
And best of all — it was delicious.
Enjoy!
No comments:
Post a Comment