

Hey everyone! Wow, I really thought I was going to be on top of Mini Penny during quarantine. But I'm 72 days into this and I've given you only two posts. How did I manage that? Where did the last couple of months go? I hope you are all able to stay home and healthy. This period has certainly taken its toll on me (emotionally, mentally, financially), but things are finally feeling like they are getting easier. I've been filling my days with Animal Crossing, 90 Day Fiance, and projects. I went the first month and a half with no nails — which, yes, is odd for me. I just figured why do my nails if no one is going to see them? But then after a while, I remembered that I love nails and I missed doing them. In a bid to find some new ways to do them, I busted out my Cricut machine and got to work. I have created a few different styles of nail art stickers, all of which are now available in my Etsy Shop! Click through to see the three new styles and how to use them.
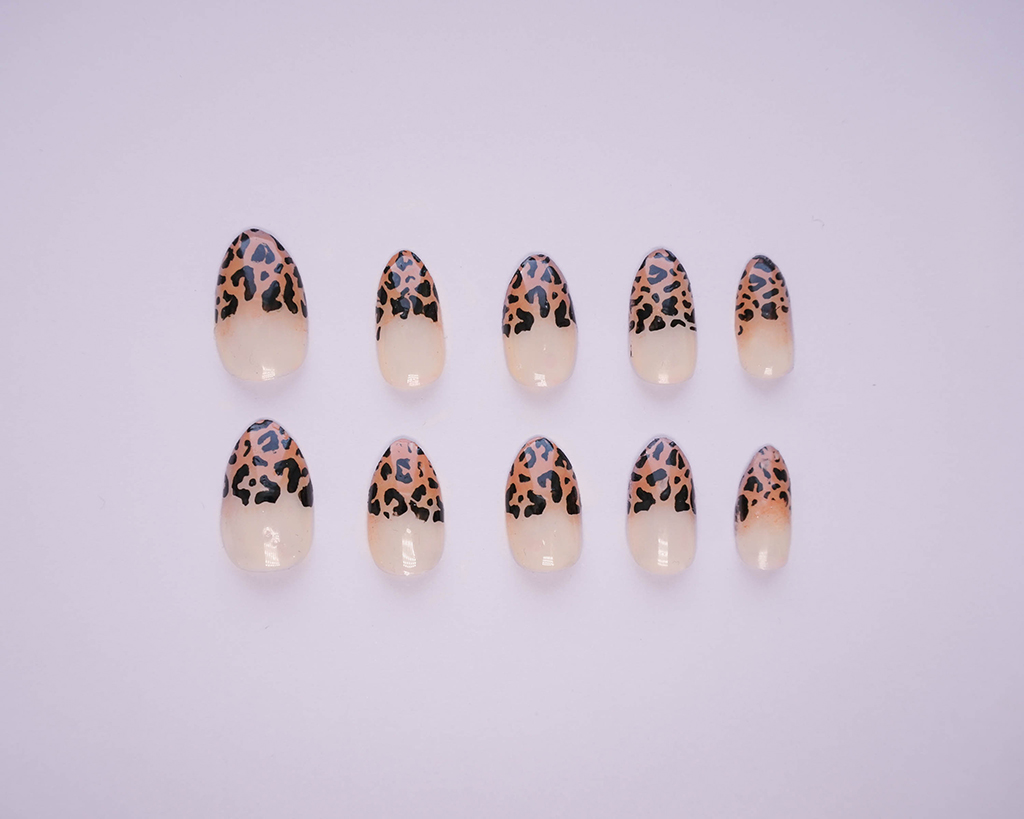
Okay, for starters, let's bring 90 Day Fiance back up. Because I love that show, all of its spin offs, and all of its insanity. During the current season of Before the 90 Days, there is an amazing sunbeam of a person named Erika and she has such an amazing, bright, and fun closet. There is a scene where she is wearing a leopard print pink and purple romper from a brand called Glitter Disco Child. Needless to say, I'm obsessed with it. Should I buy the romper? Probably. The pre-order is sitting in my cart right now and I just hover over the Buy button like a crazy person. Anyway, long story short, I painted these leopard print nails pink and purple as an homage to that gorgeous romper.
But onto the stickers!
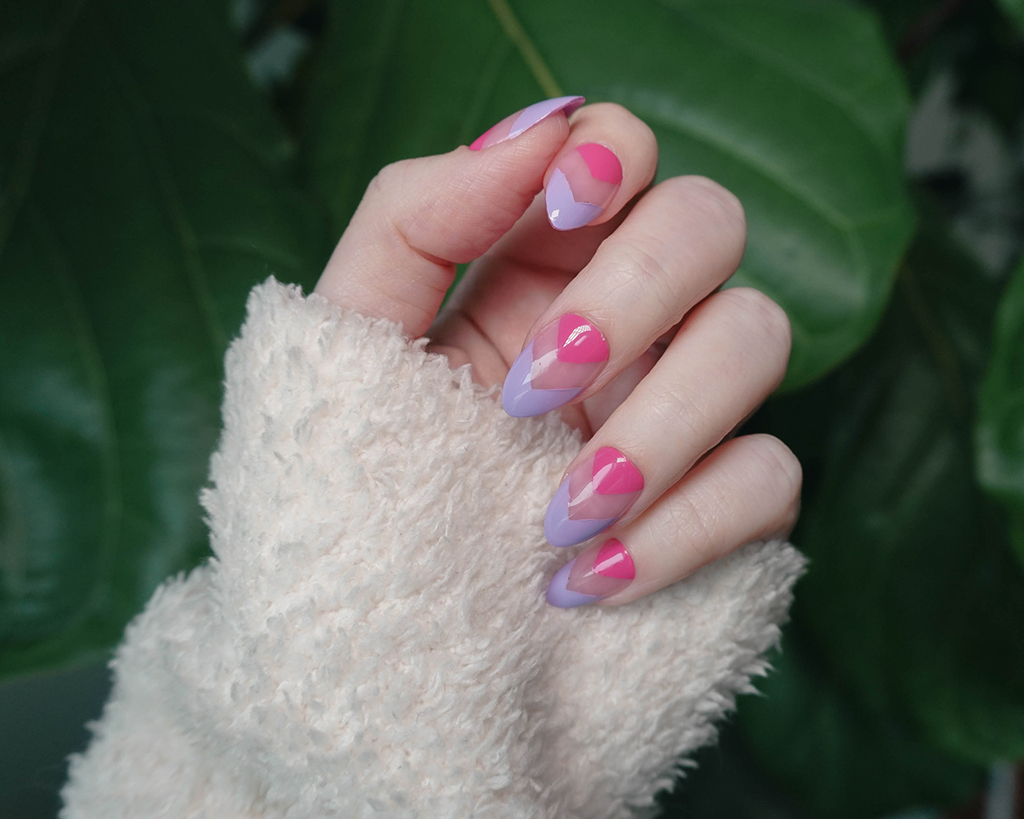
The most basic style is the chevron. This is your standard nail guide sticker — great for making negative spaces or angled tips. The angled tips are probably one of my go-to nail styles these days and the chevron stickers make everything uniform and easy! Buy them here
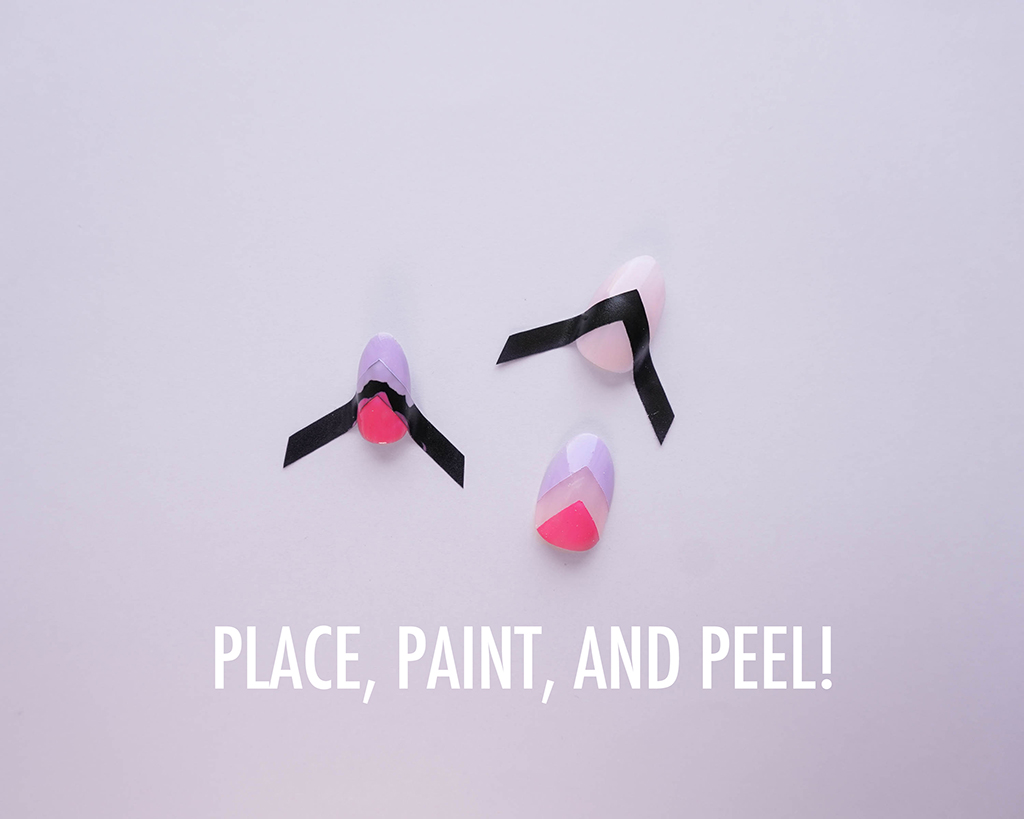
They're pretty straight forward to use — just peel one from the sheet and place it over your fully dry base color. It's very important for your polish to be completely dry before you place the nail sticker over it! Once you have the sticker guide placed, you can paint one side or both to get the desired effect. Let the polish dry, peel the stickers off, and you are left with a clean design.

My favorite part of the chevron stickers is that they actually come with 20 sticker guides — ten each of two different styles. There's a regular style (shown here) and a more dramatic deep v (as shown in the nails I'm wearing above.

Next up are my beloved Leopard Print nails. I'm always a sucker for leopard print and the possibilities with these are endless. You can cover the whole nail, partial nail, or do any color combination you want! The instructions are the same as the Chevron nails above, but can take a little more patience. Really make sure you press the sticker down firmly when you place it so that you avoid getting any outside of the stencil! I even make a TikTok showing how to use this exact style!
I made another set with these stickers that only cover half of the nail, laid over an ombre base. This style does cost a little more than the others but that's because it takes me much longer to make! I hope you love them as much as I do.
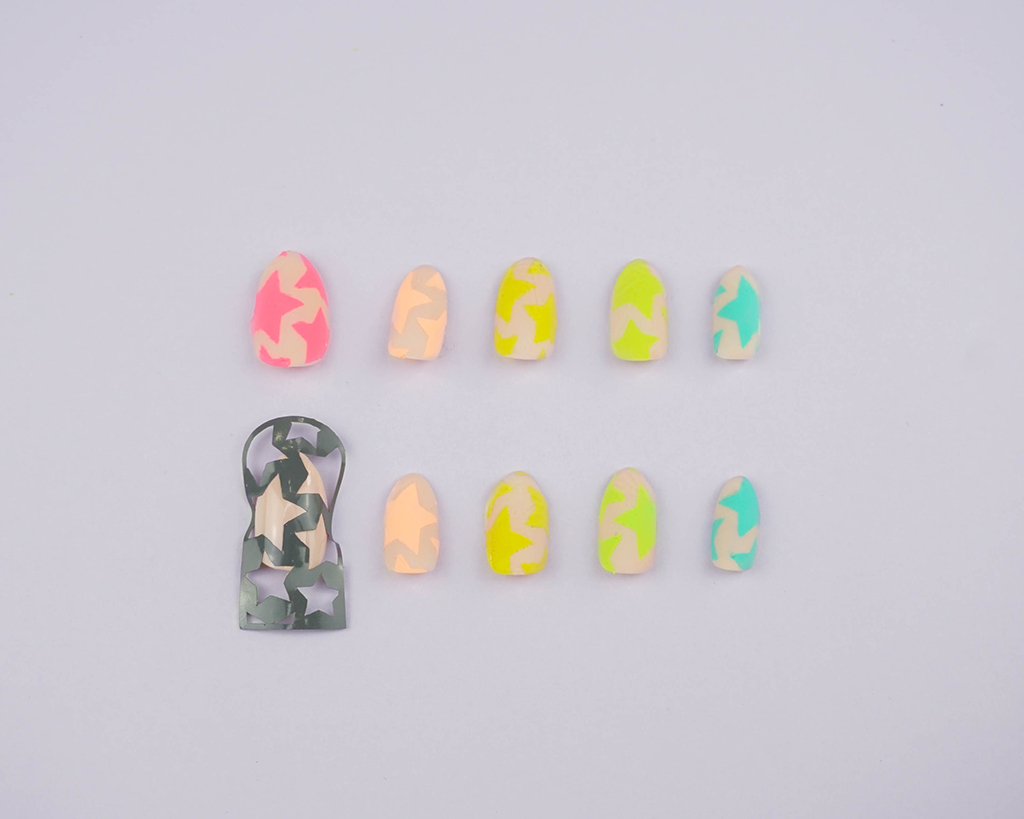
And finally, my star nails. This was actually the first design I tried to make with my Cricut. I had mild success but tweaked it just a little so that the sticker could lay smoother on the press-on. In the end, I am so happy with these little cuties! I made mine nude, rainbow, and matte for a total change of pace. Buy them here.
Which ones are your favorites and what designs do you want to see next? I can't wait to keep creating! Be sure to check out my full Etsy shop for Animal Crossing and Kpop stickers. I'm very thankful to everyone who has made orders already and love sending out all of these cute packages!
No comments:
Post a Comment